Introduction
When it comes to protecting your home from water damage, one often overlooked aspect is the efficiency of your gutters. The accumulation of debris can lead to clogs, which in turn can cause overflow and potential structural issues. This is where gutter guards come into play. For homeowners seeking the most effective solutions, the best gutter guards consumer reports provide invaluable insights into the top products available on the market.
These reports evaluate various gutter guard systems based on performance, durability, ease of installation, and cost-effectiveness. By examining consumer feedback and expert reviews, these reports help you make an informed decision on which gutter guards will best suit your needs, ensuring your home remains safe and dry.
As you delve into the options available, it’s essential to consider factors such as the type of debris your gutters are prone to collecting, the climate in your area, and your budget. The right gutter guard can save you time, money, and the hassle of frequent maintenance, making it a worthwhile investment for any homeowner.
Top Products

Gutter Guard, 2 Pack Heavy Duty 304 Stainless Steel Downspout Guard, 4.7" L ×3.5" W ×3.95" H Adjustable Opening, Fits 2" x 3" Pipe, Anti-Clog Leaf Filter Bird Rodent Barrier for Roof Drain Protection
Protect your home’s drainage system with the Gutter Guard 2 Pack, designed from heavy-duty 304 stainless steel. These adjustable downspout guards effectively prevent clogs caused by leaves, birds, and rodents.
Best for: Homeowners looking for reliable and durable gutter protection solutions.
Check Price on Amazon
Gutter Guard by Superior 6" 48ft Kit with Screws & Setter, Contractor Grade DIY Friendly Gutter Guards, Stainless-Steel Micro Mesh Gutter Cover
The Superior 6" Gutter Guard Kit is a contractor-grade solution designed for DIY enthusiasts, featuring durable stainless-steel micro mesh to keep your gutters free from debris and clogs. Easy to install and built to last, this gutter guard system is perfect for maintaining your home’s drainage.
Best for: Homeowners looking for a reliable and durable gutter protection solution that is easy to install.
Check Price on Amazon
The Gutter Guard - Wedge Eliminates Downspout Pipe Clogs From Leaves and Debris - 2-Pack
The Gutter Guard Wedge is designed to effectively eliminate clogs in downspout pipes caused by leaves and debris. This 2-pack offers a practical solution to keep your gutters flowing freely and protect your home from water damage.
Best for: Homeowners looking for an affordable and efficient way to prevent gutter clogs.
Check Price on AmazonTop 9 Best Gutter guards consumer reports
Gutter Guard, 2 Pack Heavy Duty 304 Stainless Steel Downspout Guard, 4.7" L ×3.5" W ×3.95" H Adjustable Opening, Fits 2" x 3" Pipe, Anti-Clog Leaf Filter Bird Rodent Barrier for Roof Drain Protection
Protect your home’s drainage system with the Gutter Guard 2 Pack, designed from heavy-duty 304 stainless steel. These adjustable downspout guards effectively prevent clogs caused by leaves, birds, and rodents.
Best for: Homeowners looking for reliable and durable gutter protection solutions.
Check Price on AmazonGutter Guard by Superior 6" 48ft Kit with Screws & Setter, Contractor Grade DIY Friendly Gutter Guards, Stainless-Steel Micro Mesh Gutter Cover
The Superior 6" Gutter Guard Kit is a contractor-grade solution designed for DIY enthusiasts, featuring durable stainless-steel micro mesh to keep your gutters free from debris and clogs. Easy to install and built to last, this gutter guard system is perfect for maintaining your home’s drainage.
Best for: Homeowners looking for a reliable and durable gutter protection solution that is easy to install.
Check Price on AmazonThe Gutter Guard - Wedge Eliminates Downspout Pipe Clogs From Leaves and Debris - 2-Pack
The Gutter Guard Wedge is designed to effectively eliminate clogs in downspout pipes caused by leaves and debris. This 2-pack offers a practical solution to keep your gutters flowing freely and protect your home from water damage.
Best for: Homeowners looking for an affordable and efficient way to prevent gutter clogs.
Check Price on Amazon
EBaokuup 8 Pack Gutter Downsport Guards - 3.5 Inch Expandable Aluminium Filter Strainer, Gutter Downspout Protectors for Preventing Blockage Leaves Debri
The EBaokuup 8 Pack Gutter Downspout Guards are designed to keep your gutters free from debris and blockages, ensuring proper water flow and protecting your home from water damage. Made from durable aluminum, these expandable filters are an essential addition to any home maintenance toolkit.
Best for: Homeowners looking for an affordable and effective way to prevent gutter clogs.
Check Price on Amazon
EasyOn Stainless Steel 36' Gutterguard - Fits 5" Gutters
The EasyOn Stainless Steel Gutterguard is designed to fit 5-inch gutters, providing a durable solution to keep debris out and ensure optimal water flow. With its sleek stainless steel construction, this gutter guard combines functionality with a modern aesthetic.
Best for: Homeowners looking for a durable and effective solution to keep their gutters free from debris.
Check Price on Amazon
Laicky 10 Pack Gutter Downspout Guards 3.5 Inch Adjustable Aluminium Filter Strainer, Expandable Gutter Strainer for Preventing Blockage Leaves Debris Drain Net Cover Gardening Tools
The Laicky 10 Pack Gutter Downspout Guards are designed to effectively filter out leaves and debris, ensuring your gutters remain clear and functional. Made from adjustable aluminum, these strainers are perfect for maintaining your garden's drainage system.
Best for: Homeowners looking to maintain clean gutters and prevent blockages from leaves and debris.
Check Price on Amazon
GutterBrush Downspout Gutter Guard for Standard 5 Inch Gutters | 4 Pieces - 18 in. Each - 6 Ft Total | DIY Leaf Filter, No Tools Needed Prevents Clogs - 4.25” Diameter - 4-Pack Downspout Guard (6 ft)
The GutterBrush Downspout Gutter Guard is an innovative solution designed for standard 5-inch gutters, effectively preventing clogs caused by leaves and debris. This easy-to-install DIY leaf filter comes in a convenient 4-pack, providing a total of 6 feet of protection without the need for tools.
Best for: Homeowners looking for an easy and effective way to maintain their gutters and prevent clogs.
Check Price on Amazon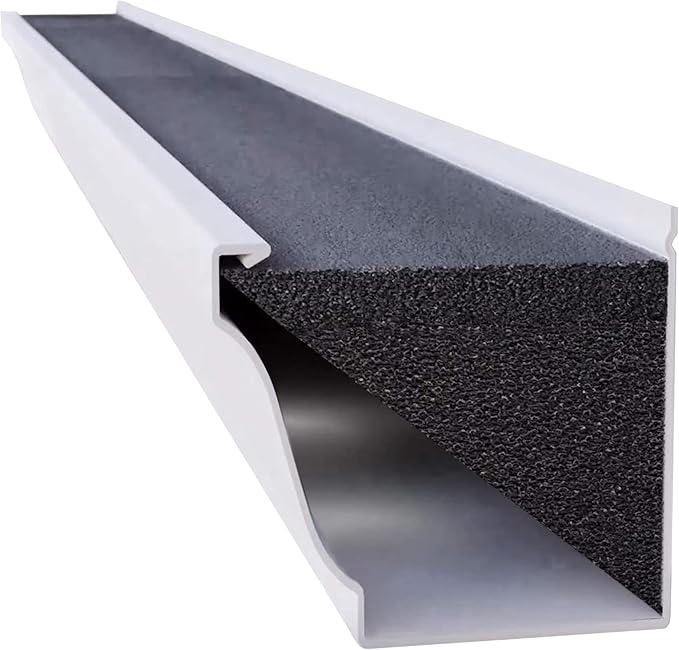
Original Gutter Guard - 4-Inch K Style Foam Gutter Filter Insert with Year Round Leaf Protection & Easy DIY Installation - GSK432-2
The Original Gutter Guard is a reliable 4-inch K Style foam gutter filter designed to provide year-round leaf protection while ensuring easy DIY installation. Keep your gutters clear and flowing effortlessly with this efficient solution.
Best for: Homeowners seeking an affordable and easy solution for gutter maintenance.
Check Price on Amazon
SDSNTE Lock-in Gutter Guard - 6” x 120 ft Durable Coated Steel Leaf Gutter Guards Micro Mesh Gutter Screens Gutter Protection Covers Fit K Style Gutter, Black, Pack of 40
The SDSNTE Lock-in Gutter Guard is a premium solution for keeping your gutters free from leaves and debris. Made from durable coated steel, these micro mesh gutter screens offer reliable protection and fit perfectly on K-style gutters.
Best for: Homeowners looking for reliable and durable gutter protection.
Check Price on AmazonSpecific Details in Reviews
1. Gutter Guard, 2 Pack Heavy Duty (Best for Homeowners Seeking Durability)
Protect your home’s drainage system with the Gutter Guard 2 Pack, designed from heavy-duty 304 stainless steel. These adjustable downspout guards effectively prevent clogs caused by leaves, birds, and rodents.
Best for: Homeowners looking for reliable and durable gutter protection solutions.
Check Price on AmazonKey Features
- Heavy-duty 304 stainless steel construction for durability
- Adjustable opening fits standard 2" x 3" pipes
- Compact dimensions: 4.7" L × 3.5" W × 3.95" H
- Anti-clog design to keep gutters clear
- Easy installation with no special tools required
Pros
- Long-lasting material: Made from high-quality stainless steel, these guards resist rust and corrosion, ensuring a long lifespan.
- Customizable fit: The adjustable opening allows for a secure fit on various downspout sizes, enhancing versatility.
- Effective debris protection: The anti-clog design effectively keeps leaves and other debris out, reducing maintenance efforts.
- Simple installation: With no need for special tools, you can easily install these guards yourself, saving time and money.
Cons
- Limited size options: Only fits specific downspout dimensions, which may not accommodate all homes.
- Initial cost: The upfront price may be higher than some plastic alternatives, though it offers better durability.
- Potential for installation challenges: Users may find installation tricky if they are not familiar with gutter systems.
Specs
| Material | 304 Stainless Steel |
|---|---|
| Dimensions | 4.7" L × 3.5" W × 3.95" H |
| Fit | 2" x 3" Pipe |
| Pack | 2 Guards |
At a Glance
2. Gutter Guard by Superior 6" 48ft (Best for Homeowners Seeking Durability)
The Superior 6" Gutter Guard Kit is a contractor-grade solution designed for DIY enthusiasts, featuring durable stainless-steel micro mesh to keep your gutters free from debris and clogs. Easy to install and built to last, this gutter guard system is perfect for maintaining your home’s drainage.
Best for: Homeowners looking for a reliable and durable gutter protection solution that is easy to install.
Check Price on AmazonKey Features
- 48 feet of stainless-steel micro mesh for optimal debris protection.
- DIY-friendly installation with included screws and setter.
- Contractor-grade quality ensures long-lasting performance.
- Compatible with most standard 6-inch gutters.
- Sleek design that blends seamlessly with your roofline.
Pros
- Durable construction: Made from high-quality stainless steel, this gutter guard is resistant to rust and corrosion, ensuring longevity.
- Easy installation: The kit comes with all necessary hardware and a setter tool, making it simple for anyone to install without professional help.
- Effective debris prevention: The micro mesh design allows water to flow freely while blocking leaves and other debris, reducing maintenance needs.
- Versatile fit: Designed to work with most standard 6-inch gutters, this guard is suitable for a variety of homes and roof styles.
Cons
- Initial cost: While the investment is worthwhile, the upfront price may be higher compared to basic gutter guards.
- Installation time: DIY installation may take longer than expected, especially for larger homes.
- Limited color options: The stainless-steel finish may not match all home aesthetics, limiting customization.
Specs
| Length | 48 feet |
|---|---|
| Material | Stainless steel |
| Mesh Size | Micro mesh |
| Compatibility | 6-inch gutters |
At a Glance
3. The Gutter Guard – Wedge Eliminates (Best for Homeowners Seeking Efficiency)
The Gutter Guard Wedge is designed to effectively eliminate clogs in downspout pipes caused by leaves and debris. This 2-pack offers a practical solution to keep your gutters flowing freely and protect your home from water damage.
Best for: Homeowners looking for an affordable and efficient way to prevent gutter clogs.
Check Price on AmazonKey Features
- Easy installation without tools required.
- Durable materials ensure long-lasting performance.
- Fits most standard downspout pipes.
- Lightweight design for effortless handling.
- Designed to prevent leaf and debris buildup.
Pros
- Effective clog prevention: The unique wedge design significantly reduces the chances of downspout clogs, ensuring smooth water flow.
- User-friendly installation: No tools are needed, making it simple for anyone to set up in minutes.
- Durable construction: Made from high-quality materials, these guards are built to withstand harsh weather conditions.
- Cost-effective solution: With two guards in a pack, you get great value for your money while protecting your home.
Cons
- Limited fit options: May not fit all custom downspout sizes perfectly.
- Requires occasional cleaning: While it reduces clogs, some debris may still accumulate and need periodic maintenance.
- Not suitable for heavy rainfall: In extreme weather, additional measures may be necessary to manage water flow effectively.
Specs
| Material | Durable plastic |
|---|---|
| Pack Size | 2 |
| Dimensions | Standard downspout size |
| Weight | Lightweight |
At a Glance
4. EBaokuup 8 Pack Gutter Downsport Guards (Best for Homeowners on a Budget)
The EBaokuup 8 Pack Gutter Downspout Guards are designed to keep your gutters free from debris and blockages, ensuring proper water flow and protecting your home from water damage. Made from durable aluminum, these expandable filters are an essential addition to any home maintenance toolkit.
Best for: Homeowners looking for an affordable and effective way to prevent gutter clogs.
Check Price on AmazonKey Features
- 3.5-inch expandable design for versatile fitting
- Durable aluminum construction for long-lasting use
- Effectively prevents leaves and debris from clogging downspouts
- Easy to install with no tools required
- Pack of 8 provides excellent value for comprehensive coverage
Pros
- Effective debris protection: These guards significantly reduce the amount of leaves and debris that can clog your gutters, ensuring smooth water flow.
- Durable materials: Made from high-quality aluminum, these filters are built to withstand harsh weather conditions and resist rust.
- Easy installation: No tools are needed for installation, making it a hassle-free process for homeowners.
- Cost-effective solution: With 8 guards included in the pack, you get great value for money while protecting multiple downspouts.
Cons
- Limited size options: The 3.5-inch size may not fit all downspouts, so be sure to measure before purchasing.
- Potential for wind displacement: In high winds, these guards may become dislodged if not properly secured.
- Not suitable for all climates: In areas with heavy snowfall, additional measures may be needed to prevent ice buildup.
Specs
| Size | 3.5 inches |
|---|---|
| Material | Aluminum |
| Pack Size | 8 |
| Weight | 1.2 pounds |
At a Glance
5. EasyOn Stainless Steel 36' Gutterguard – (Best for Homeowners Seeking Durability)
The EasyOn Stainless Steel Gutterguard is designed to fit 5-inch gutters, providing a durable solution to keep debris out and ensure optimal water flow. With its sleek stainless steel construction, this gutter guard combines functionality with a modern aesthetic.
Best for: Homeowners looking for a durable and effective solution to keep their gutters free from debris.
Check Price on AmazonKey Features
- Made from high-quality stainless steel for long-lasting durability.
- Fits standard 5-inch gutters for easy installation.
- Designed to prevent leaves and debris from clogging gutters.
- Rust-resistant finish for enhanced weather resistance.
- Sleek design that blends seamlessly with your home's exterior.
Pros
- Easy installation: The EasyOn Gutterguard can be installed without professional help, saving you time and money.
- Durable construction: Made from stainless steel, it withstands harsh weather conditions and won’t warp or crack over time.
- Effective debris prevention: Keeps gutters clear of leaves and twigs, reducing the need for frequent cleaning.
- Aesthetic appeal: Its sleek design enhances the look of your home while providing essential protection.
Cons
- Price point: At $79.95, it may be more expensive than some plastic alternatives.
- Limited size options: Designed specifically for 5-inch gutters, which may not fit all gutter types.
- Installation challenges: Some users may find installation tricky without prior experience.
Specs
| Material | Stainless Steel |
|---|---|
| Length | 36 inches |
| Compatibility | 5-inch gutters |
| Weight | 2.5 lbs |
At a Glance
6. Laicky 10 Pack Gutter Downspout Guards (Best for Homeowners with Gutters)
The Laicky 10 Pack Gutter Downspout Guards are designed to effectively filter out leaves and debris, ensuring your gutters remain clear and functional. Made from adjustable aluminum, these strainers are perfect for maintaining your garden's drainage system.
Best for: Homeowners looking to maintain clean gutters and prevent blockages from leaves and debris.
Check Price on AmazonKey Features
- Adjustable design to fit 3.5-inch downspouts.
- Made from durable aluminum for long-lasting use.
- Expandable to accommodate various gutter sizes.
- Easy to install and remove for cleaning.
- Helps prevent blockages, reducing maintenance efforts.
Pros
- Effective debris protection: These guards efficiently block leaves and debris, ensuring your gutters remain clear and functional.
- Durable construction: Made from high-quality aluminum, they resist rust and corrosion, providing longevity.
- Customizable fit: The adjustable design allows for a snug fit on various downspout sizes, enhancing versatility.
- Easy maintenance: Simply remove and clean when necessary, making gutter upkeep hassle-free.
Cons
- Limited color options: Currently available only in a standard aluminum finish, which may not match all home exteriors.
- Installation may require tools: Some users might need basic tools for optimal installation, which could be inconvenient.
- Not suitable for larger downspouts: Designed specifically for 3.5-inch downspouts, they may not fit larger sizes effectively.
Specs
| Material | Aluminum |
|---|---|
| Size | 3.5 inches |
| Pack Size | 10 |
| Weight | 1.2 lbs |
At a Glance
7. GutterBrush Downspout Gutter Guard for Standard (Best for Easy Gutter Maintenance)
The GutterBrush Downspout Gutter Guard is an innovative solution designed for standard 5-inch gutters, effectively preventing clogs caused by leaves and debris. This easy-to-install DIY leaf filter comes in a convenient 4-pack, providing a total of 6 feet of protection without the need for tools.
Best for: Homeowners looking for an easy and effective way to maintain their gutters and prevent clogs.
Check Price on AmazonKey Features
- Fits standard 5-inch gutters.
- Each piece measures 18 inches, totaling 6 feet.
- Simple DIY installation—no tools required.
- Designed to prevent clogs from leaves and debris.
- 4.25-inch diameter for optimal fit and performance.
Pros
- Easy installation: No tools are required, making setup a breeze for homeowners.
- Effective clog prevention: Keeps gutters clear, reducing the risk of water damage to your home.
- Durable design: Made to withstand various weather conditions, ensuring long-lasting performance.
- Cost-effective solution: Comes in a 4-pack, providing excellent value for maintaining your gutter system.
Cons
- Limited length: The total coverage of 6 feet may not be sufficient for larger homes with extensive gutter systems.
- Size compatibility: Only fits standard 5-inch gutters, which may not suit all gutter types.
- Initial cost: Some users may find the upfront price higher compared to traditional gutter guards.
Specs
| Material | Durable synthetic fibers |
|---|---|
| Length per piece | 18 inches |
| Total Length | 6 feet |
| Diameter | 4.25 inches |
| Pack Size | 4 pieces |
At a Glance
8. Original Gutter Guard – 4-Inch K (Best for Homeowners Seeking Easy Maintenance)
The Original Gutter Guard is a reliable 4-inch K Style foam gutter filter designed to provide year-round leaf protection while ensuring easy DIY installation. Keep your gutters clear and flowing effortlessly with this efficient solution.
Best for: Homeowners seeking an affordable and easy solution for gutter maintenance.
Check Price on AmazonKey Features
- 4-inch K Style design for optimal fit.
- Foam material that blocks leaves and debris.
- Year-round protection against clogs.
- Easy to install without professional help.
- Durable construction for long-lasting use.
Pros
- Effective debris blocking: The foam design prevents leaves and twigs from entering your gutters, reducing maintenance needs.
- Simple installation: No tools or professional assistance required, making it a hassle-free DIY project.
- Durable performance: Made to withstand various weather conditions, ensuring longevity and reliability throughout the year.
- Cost-effective solution: Priced at $65.60, it offers excellent value by minimizing gutter cleaning expenses.
Cons
- Limited color options: Available only in a standard color, which may not match all home exteriors.
- Not suitable for heavy rainfall: In extreme weather, some users report that it may not handle excessive water flow effectively.
- Requires occasional checks: While it reduces maintenance, periodic inspections are still necessary to ensure optimal performance.
Specs
| Material | Foam |
|---|---|
| Size | 4 inches |
| Installation | DIY |
| Protection | Year-round |
At a Glance
9. SDSNTE Lock-in Gutter Guard – 6” (Best for Homeowners Seeking Durability)
The SDSNTE Lock-in Gutter Guard is a premium solution for keeping your gutters free from leaves and debris. Made from durable coated steel, these micro mesh gutter screens offer reliable protection and fit perfectly on K-style gutters.
Best for: Homeowners looking for reliable and durable gutter protection.
Check Price on AmazonKey Features
- Durable coated steel construction
- Micro mesh design for optimal debris filtration
- Fits standard K-style gutters
- Pack of 40 for comprehensive coverage
- Sleek black finish for an unobtrusive look
Pros
- Exceptional durability: Built from high-quality coated steel, ensuring long-lasting performance against the elements.
- Effective debris protection: The micro mesh design effectively blocks leaves and small debris while allowing water to flow freely.
- Easy installation: Designed for a straightforward lock-in system, making installation quick and hassle-free.
- Aesthetically pleasing: The black finish blends seamlessly with most gutter systems, enhancing your home's appearance.
Cons
- Potential for rust: While coated, prolonged exposure to moisture may lead to rust over time if not maintained.
- Limited fit: Specifically designed for K-style gutters, which may not accommodate other gutter types.
- Installation tools required: Some basic tools may be necessary for installation, which could deter DIY beginners.
Specs
| Length | 120 ft |
|---|---|
| Width | 6 inches |
| Material | Coated steel |
| Color | Black |
| Pack Size | 40 units |
At a Glance
Buying Guides
When selecting the best gutter guards based on consumer reports, there are several practical criteria to consider. These guidelines will help you make an informed decision that meets your specific needs.
Material Quality
– Durability: Look for materials that can withstand harsh weather conditions, such as aluminum, stainless steel, or high-quality plastic.
– Corrosion Resistance: Ensure the material is resistant to rust and corrosion to maintain longevity.
Design and Functionality
– Mesh Size: Smaller mesh sizes can prevent even the tiniest debris from clogging your gutters, while larger sizes might allow for better water flow.
– Installation Type: Consider whether the gutter guards are easy to install yourself or if they require professional installation.
– Compatibility: Ensure the guards are compatible with your existing gutter system, whether it’s K-style or half-round.
Maintenance Requirements
– Self-Cleaning Features: Some gutter guards are designed to minimize maintenance by allowing debris to wash off with rain.
– Ease of Cleaning: If maintenance is required, check how easy it is to clean the gutter guards.
Effectiveness
– Water Flow Rate: Read consumer reports on how much water the guards can handle during heavy rainfall without overflow.
– Debris Prevention: Look for reviews that detail how effectively the gutter guards keep leaves and debris out of the gutters.
Warranty and Customer Support
– Warranty Length: A longer warranty can indicate confidence in the product’s durability and effectiveness.
– Customer Support: Evaluate the availability of customer service for installation help or product inquiries.
Price and Value
– Budget: Determine your budget and compare the features offered at different price points.
– Cost vs. Benefits: Assess whether the cost aligns with the benefits provided, such as reduced maintenance and extended gutter life.
By considering these criteria, you can identify the best gutter guards that align with consumer reports and your specific needs.
FAQs
What are gutter guards, and why are they important?
Gutter guards are protective devices installed over gutters to prevent debris like leaves and twigs from clogging them. They are important because they help maintain proper water flow, reduce the need for frequent cleaning, and prevent water damage to your home.
What types of gutter guards are available?
There are several types of gutter guards, including:
– Screen gutter guards: Use a mesh screen to block debris while allowing water to flow through.
– Reverse curve guards: Direct water around a curved surface, allowing it to enter the gutter while keeping debris out.
– Foam gutter inserts: Fit inside the gutter and block debris while allowing water to filter through.
– Micro-mesh guards: Feature a fine mesh that keeps out even small debris.
How do I choose the best gutter guards?
When choosing the best gutter guards, consider the following factors:
– Material: Choose durable materials like stainless steel or aluminum.
– Type of debris: Assess the type of debris common in your area to select the appropriate guard.
– Installation: Determine whether you want a DIY option or professional installation.
– Warranty: Look for products that offer a good warranty for added peace of mind.
Are gutter guards worth the investment?
Yes, gutter guards can be worth the investment if you live in an area with heavy foliage or frequent gutter clogs. They can save you time and money in maintenance costs and prevent potential water damage to your home.
Where can I find consumer reports on gutter guards?
You can find consumer reports on gutter guards through various sources, including:
– Consumer Reports website: Offers reviews and ratings based on rigorous testing.
– Home improvement websites: Many provide comparisons and user reviews.
– Retailer websites: Customer feedback on products can give insights into performance and reliability.
Conclusion
In summary, selecting the right gutter guards can significantly impact the maintenance and longevity of your home’s roofing system. Based on the findings from various consumer reports, the best gutter guards offer efficient protection against debris while allowing optimal water flow. Investing in quality gutter guards not only minimizes cleaning efforts but also enhances the overall durability of your gutters. Whether you prioritize affordability, durability, or ease of installation, there are options available that cater to your specific needs. By choosing wisely, you can ensure that your home remains protected from water damage and other related issues.